Top Airbnb Photography Tips for iPhone and Android Users
Scrolling through Airbnb listings is a lot like swiping on a dating app. A tiny thumbnail has a split second to stop the scroll, spark a feeling, and earn a tap. In that moment, guests aren’t reading your description or comparing your amenity list - they’re judging the vibe. And that first impression almost always comes from the photos.
For hosts, that’s both a pressure and a perk. Professional shoots can be pricey, and décor evolves, pillows change, art moves, seasons shift. You don’t want to hire a photographer every time you add a throw blanket. The good news: you don’t have to. The camera already in your pocket is more than capable of producing warm, polished images that make people think, “I could stay there.”
This guide shows you how to do exactly that, with just your smartphone. I’ll cover how to prep a space so it reads clean and welcoming on camera, how to use natural light to make rooms feel bigger and brighter, and how to compose shots that invite viewers to imagine themselves in the scene. You’ll learn simple tricks like where to stand, what height to shoot from, and which angles flatter small rooms (hello, corner-to-corner). We’ll also touch on when to use your phone’s ultra-wide lens—and when not to—so you avoid distorted walls and “fishbowl” ceilings.
You’ll get a practical shot list for every room, kitchen, living area, bedrooms, bathrooms, outdoor space — so you don’t miss the money shots that sell the stay (think: the coffee setup, the reading nook, the view from the bed). We’ll walk through quick, tasteful styling moves that feel lived-in, not staged, and a five-minute editing flow you can do on your phone to keep colours natural and whites truly white.
Along the way, I’ll share before-and-afters from real Airbnb hosts who used these exact techniques to refresh their listings and, in turn, improve click-through and bookings—without hiring a pro. You’ll see what changed, why it worked, and how you can replicate it in your place.
By the end, you’ll have:
A repeatable, room-by-room photo plan
Clear guidelines for lighting, angles, and framing
A lightweight editing workflow that keeps images consistent
A checklist of common mistakes to avoid (blown-out windows, crooked lines, clutter)
Whether you’re launching a new listing or giving an old one a glow-up, consider this your friendly, step-by-step playbook. Let’s make your photos do the heavy lifting—so guests don’t just stop the scroll, they hit “Book.”

Tip: Use your iPhone or Android to capture Airbnb’s natural surroundings at golden hour. Hold the phone level in landscape, 4:3 aspect, grid on. Tap-to-focus and slide exposure slightly down to preserve sky detail. Avoid mixed lighting; switch off stray lamps near windows. Include a simple foreground—path, fence, foliage—and lead the eye with lines toward the subject. Step back instead of zooming; use ultra-wide sparingly to prevent distortion. Keep HDR/Smart HDR on, lock white balance if available, and wipe the lens. Edit lightly for natural colour and contrast, then export high-resolution images for a crisp, trustworthy gallery across the set.
Setting the Scene (UK Airbnb Staging Tips for Photos)
Before you even open the camera on your phone, decide the story your photos should tell. Guests aren’t just shopping for a bed; they’re picturing mornings with a proper brew, a cosy evening on the sofa after a day out, or a sunny brunch with the balcony door open. Staging is how you make those moments obvious in your Airbnb listing photos without cluttering the space.
Walk in like a guest would—from the pavement to the front door—and notice what you see first. If the living room is your hero, make it irresistible. Fold a soft throw with clean edges, plump the cushions, and place a book and mug on the coffee table. If the bedroom is your selling point, iron the duvet, stack pillows neatly, and add a textured blanket at the foot for depth. Keep props believable: a small vase with greenery, a breakfast tray with a croissant and juice, a candle (unlit), a neatly folded towel stack. These are simple Airbnb staging tips for photos that suggest a lived-in feel without turning the place into a showroom.
Light is the single most important factor, especially in the UK where bright overcast is common and gorgeous on camera. Plan shoots for late morning or early afternoon when daylight is soft but strong. Open curtains and blinds fully, level the slats, and switch off odd lamps that fight the colour of the daylight. South-facing rooms can get contrasty; a sheer curtain will tame the glare while keeping the glow. If a room feels dull, place a white sheet or foam board opposite the window to bounce light back in. “We’ll fix it later” is a trap—get as much right in-camera as possible.
Small spaces still matter. Bathrooms, hallways and the entrance are part of the guest journey. Reduce visual noise: hide toiletries, close the loo lid, wipe chrome and mirrors, and add one simple detail like a neatly folded hand towel or a green sprig in a bud vase. Outside, give guests context. Include Airbnb exterior photos that show the front elevation, the entry, the drive or parking situation, and any terrace or garden. Time exteriors for golden hour when the UK sun sits low and warm or for bright overcast when colours look clean and true.
A repeatable shot plan keeps you focused: one hero wide shot to establish the room, a second angle that shows flow (for example, lounge into kitchen), and two tighter vignettes that sell a feeling—the coffee setup, the reading nook, the view from the bed. That structure ensures you capture the images that actually convert browsers into bookers.

Tip: Photograph a cosy, natural living room on iPhone or Android in soft daylight. Shoot landscape at 4:3 with the grid on, keeping verticals level. Stage simply—plumped cushions, folded throw, a plant and a warm mug—to suggest comfort without clutter. Stand corner-to-corner, tap to focus on mid-tones, then nudge exposure down to preserve window detail. Avoid mixed lighting: switch off odd lamps or match colour temperature. Use the main lens; ultra-wide sparingly to prevent distortion. Lock white balance if available, and brace or use a 3s timer for sharpness. Edit lightly—straighten, crop distractions, lift shadows modestly—for an inviting, true-to-life result.
Phone Photo Tips for Airbnb (UK)
Recent iPhones are brilliant for interiors if you use them deliberately. For iPhone camera settings for interiors, set your aspect ratio to 4:3 to use the full sensor, switch the grid on so verticals stay straight, and keep Smart HDR on or Auto to balance bright windows with darker corners. Start with the 1× main lens because it delivers the cleanest quality; bring in the 0.5× ultra-wide only when you truly need more width.
Focus and exposure are where most DIY galleries go wrong. Tap to focus on a mid-tone surface—often a sofa cushion or duvet—and then drag the little sun icon down slightly to protect window highlights. If you’re taking a series from the same position, tap-and-hold to enable AE/AF Lock so exposure and focus stay consistent shot to shot. Brace your elbows against your ribs or a doorframe, and use the 3-second timer to remove the tiny wobble that softens photos more than you realise.
At night or in dim spaces, resist the urge to lean on ultra-wide; it’s noisier. Night mode on the 1× lens does a lovely job for balconies, patios and fairy-lit gardens—hold still until the capture completes. If you love editing and your model supports it, Apple ProRAW gives more latitude for highlights and white balance, but don’t feel obliged; the built-in JPEG/HEIC files are excellent when you expose carefully.
Android Photo Tips for Airbnb (UK)
Android phones vary, but the principles are the same across Samsung Galaxy, Google Pixel, and OnePlus. Use 4:3, switch the grid on, and keep HDR on or Auto. Start with the main lens for quality and bring in the ultra-wide when a room truly needs the breadth. The Android advantage is Pro Mode—fantastic for Android Pro Mode real estate photos.
In Pro/Manual mode, set ISO between 50 and 200 to keep noise at bay. Indoors, shutter speeds around 1/60 to 1/10 second work well; if you’re slower than 1/30, brace against a wall or use a mini-tripod and the 2–3 second timer. White balance is where Android shines: set 5000–5600K for daylight or around 3000–3500K for warm lamps, and lock it so colours match from frame to frame. Use –0.3 to –0.7 exposure compensation when windows are bright, then lift shadows later in the edit. Long-press to lock AE/AF if your model supports it, and you’ll stop the camera from second-guessing you mid-sequence.
Ultra-wide lenses can make our compact UK rooms feel roomy, but they’ll also pull tall furniture at the edges into strange shapes. Keep the phone perfectly level, shoot from corner to corner, and avoid pressing large objects against the frame edges. For exteriors, blue-hour Night mode can be magical—think garden fairy lights or a firepit glowing against a deep blue sky. If colours look odd indoors, it’s usually mixed lighting; choose daylight or warm lamps, not both.

Tip: For a cosy, natural living room, shoot on iPhone or Android in bright overcast or late-afternoon light. Pull the sofa 10–15 cm off the wall, add texture (knit throw, linen cushion, small plant), and crack the curtains to diffuse glare. Set 4:3 with the grid on and keep the phone at about chest height for a natural perspective. Stand corner-to-corner, tap to focus on a mid-tone cushion, then dial exposure down ~–0.3 EV to save window detail. Use the main lens, not ultra-wide. Take one hero frame and one close vignette. Edit lightly: straighten verticals, neutral white balance, highlights –20, shadows +10.
Editing Without Overdoing It (iPhone & Android)
Editing is where good photos become inviting photos, but it’s also where trust can be lost. Guests want the space they arrive to to look like the space they booked. That means Airbnb photo editing tips that enhance, not transform.
Start with geometry before touching light or colour. Straighten horizons and square verticals so door frames and window edges run true; it instantly reads as professional. Crop out distractions at the margins—plug sockets, wires, bin lids—so the eye rests on the scene you’ve created. Now tweak the light. A tiny bump in exposure lifts the room; pull highlights down a touch to keep window detail, then raise shadows modestly to open darker corners. If whites skew yellow or blue, adjust temperature back to neutral, then nudge tint to remove green or magenta casts created by mixed bulbs.
Texture controls—Clarity, Structure, Texture—should be barely there. A small nudge adds micro-contrast to fabrics and wood grain; a heavy hand makes towels crunchy and walls gritty. Saturation or Vibrance are best left almost untouched. A little sharpening is fine, but avoid aggressive noise reduction that turns textiles plastic. Built-in editors on iPhone and Android can handle all of this. If you want finer control, Snapseed excels at perspective fixes and spot healing, while Lightroom Mobile is brilliant for copying one “anchor” edit across the rest of the set for consistency—the hallmark of trustworthy Airbnb listing photos.
Before uploading, sanity-check your gallery on another device. A photo that looks luminous on your phone might feel flat on a laptop at normal brightness. Order images so the light and colour feel steady as guests swipe from the hero image through the rooms, outdoor spaces and back to a final, warm “goodbye” shot.

Tip: Edit for honesty, not hype. On iPhone or Android, fix geometry first—straighten horizons, correct verticals, and crop distractions. Then balance light: nudge exposure up a touch, pull highlights down (–10 to –30) to keep window detail, and lift shadows (+10 to +25) to open corners. Neutralise colour casts with Temperature/Tint until whites look white, and keep that look consistent across the set. Add a hint of Texture/Clarity (+5 to +10) and light sharpening; avoid plastic-looking noise reduction. Enable lens corrections for ultra-wide shots. Spot-heal specks, not real features. Edit one anchor image in Photos/Snapseed/Lightroom Mobile, copy to the rest, review on phone and laptop, then export full-resolution JPEG/HEIC.
Case Studies (UK)
Real properties, real phones, real improvements—these three stories show how targeted Airbnb photography tips translate into bookings across very different UK spaces.
The City Flat, London — iPhone, natural-light hero shots
The host’s central London flat had great bones—an open-plan living-kitchen with tall sash windows—but the original gallery was shot in mixed lighting with leaning verticals and heavy filters. We planned a mid-morning session to get generous, soft daylight and staged one simple breakfast moment on the dining table: linen napkins, a small jug of orange juice, a plate of croissants. On the iPhone, we set 4:3, switched on the grid, and started with the 1× lens to preserve quality.
The first frame was the room’s “establishing shot”—corner to corner at eye level, phone perfectly level to keep lines straight. The second angle looked back towards the kitchen to show flow, with the breakfast tableau pulling the eye through the frame. Two vignettes followed: the reading corner with a throw and lamp, and the view from the sofa towards the window, exposure gently pulled down to keep the outside from blowing out. Editing was restrained: straighten, crop, highlights –20, shadows +15, white balance nudged to keep the cream walls cream rather than yellow.
The refreshed Airbnb listing photos felt bright, coherent and believable. Within weeks, the host reported roughly a 20% rise in bookings. Just as valuable, messages from potential guests became more specific: “Is the coffee machine Nespresso?” “What time does the light hit the dining table?”—proof that the photos were selling moments, not just a floor plan.
The Country Cottage, Yorkshire — Samsung Galaxy, Pro Mode control
This stone cottage near a market town had charm for miles—beams, thick walls, a small garden—but the interiors were dim and the existing gallery looked muddy. On a Samsung Galaxy, we leaned hard on Pro Mode for Android Pro Mode real estate photos. ISO was locked at 100–200, shutter eased to around 1/15–1/30 second, and white balance fixed at 5200K to match the cool northern daylight. Exposure compensation sat at –0.3 to protect the cottage’s bright little windows.
We shot the lounge first, bracing against a doorframe and using the 2-second timer to eliminate shake. The hero showed the log burner, sofa and the low window in one calm frame; a second angle revealed the dining nook tucked behind a beam. Later, we returned at blue hour to capture the garden. Night mode rendered the string lights warm and the firepit ember-glow rich, with the cottage’s windows shining invitingly in the background. Because we’d locked white balance earlier, the interior and night shots still felt like a single story when viewed as a gallery.
Reviews began calling the place “warm and inviting,” and the host saw an uptick in weekend stays outside peak holiday weeks. The lesson was clear: patience with Pro Mode beats cranking ISO, and a couple of carefully timed night images can sell the experience, not just the square footage.
The Modern Apartment, Manchester — Google Pixel, honest edits that build trust
A canal-side apartment in Manchester had been photographed previously with aggressive filters that shifted the concrete and oak finishes into unnatural tones. We scrapped the filters and embraced the Google Pixel’s straightforward approach. Auto mode, grid on, main lens for most frames; the ultra-wide appeared only when verticals stayed straight and the space demanded it.
We built the gallery around three sequences: arrival (entry corridor opening into the living area), living (sofa, balcony, kitchen in a single flow), and rest (bedroom and bath). Each sequence began with a clean, level hero shot, followed by two vignettes—espresso cups beside the machine, a throw and book on the balcony chair, a folded towel on the bed. Edits were minimal in the Pixel Photos app: straighten and crop, exposure +0.3, highlights –15, shadows +10, a tiny clarity bump, and the same white balance across rooms.
Guest messages shifted from “Is the colour in the bathroom accurate?” to “Could we check in early to enjoy the balcony?” Reviews described the photos as “clean, natural and true to life,” cancellations dropped, and repeat bookings increased. It’s a textbook case of smartphone real estate photography done honestly: tidy framing, gentle edits, and consistent colour.

Tip: On iPhone and Android, build a clean, consistent look with a simple mobile workflow. If your phone supports RAW/ProRAW, shoot one anchor frame in RAW for latitude, then the rest in JPEG/HEIC to save time; batch the RAW look across images in Lightroom Mobile. Otherwise, expose carefully in-camera: tap to focus, drag exposure slightly down to protect windows, and use AE/AF lock so the series matches. In edit, fix geometry first, then set a neutral white balance on a white wall or sheet and sync those settings. Add modest Highlights –15 to –30, Shadows +10 to +20, and a touch of Texture/Clarity (+5). Enable lens corrections for ultra-wide shots, spot-heal specks, and export full-resolution.
Common Pitfalls (and How to Avoid Them)
The most common mistakes are simple to fix once you know to look for them. Shooting interiors at night usually produces flat, noisy images; the solution is almost always to reschedule for daylight and trust the window light. Portrait orientation rarely plays nicely with Airbnb’s landscape-first gallery, so commit to shooting wide and keep key details away from the edges where crops can nick them. Ultra-wide lenses are seductive in tight rooms but can turn bookcases and door frames into funhouse props; start with the main lens and only go wider when you can keep the phone completely level.
Over-editing is the quickest way to erode trust. Heavy HDR halos around windows, neon-green plants, and over-sharpened textures scream “filter” rather than “home.” Keep edits light and consistent across the gallery. Mixed lighting is another silent culprit: daylight plus a handful of warm lamps leaves weird orange and blue patches on white walls. Pick one look—almost always daylight—and turn off odd bulbs. Lastly, mind the details: reflections that catch you in a mirror, open bins, cables snaking behind a TV, fridge magnets and personal post on the counter. A two-minute sweep before each room pays off tenfold in your final images.
Professional vs DIY Airbnb Photography (UK)
Phones are capable of beautiful results, but there’s a reason professional photographers are still in business. For your hero gallery - the images that sit first in search and do the heavy lifting, professional vs DIY Airbnb photography usually favours a pro. A professiona; interiors photographer will frame angles that make small rooms feel generous, keep verticals ruler-straight, balance tricky windows with the room interior, and produce a cohesive, colour-accurate edit across the set. That polish builds trust, and trust converts views into bookings.
Your smartphone still has a vital role between shoots. When you swap the bedding for summer, add herb pots to the balcony, or the garden blooms, freshen a handful of images yourself. Follow the advice in this guide—natural light, level phone, gentle edits—and your updates will blend with the professional set rather than fighting it. If you’re booking a pro, send them this staging plan in advance and do the prep the day before. They can then focus entirely on light and composition while your space already looks photo-ready.
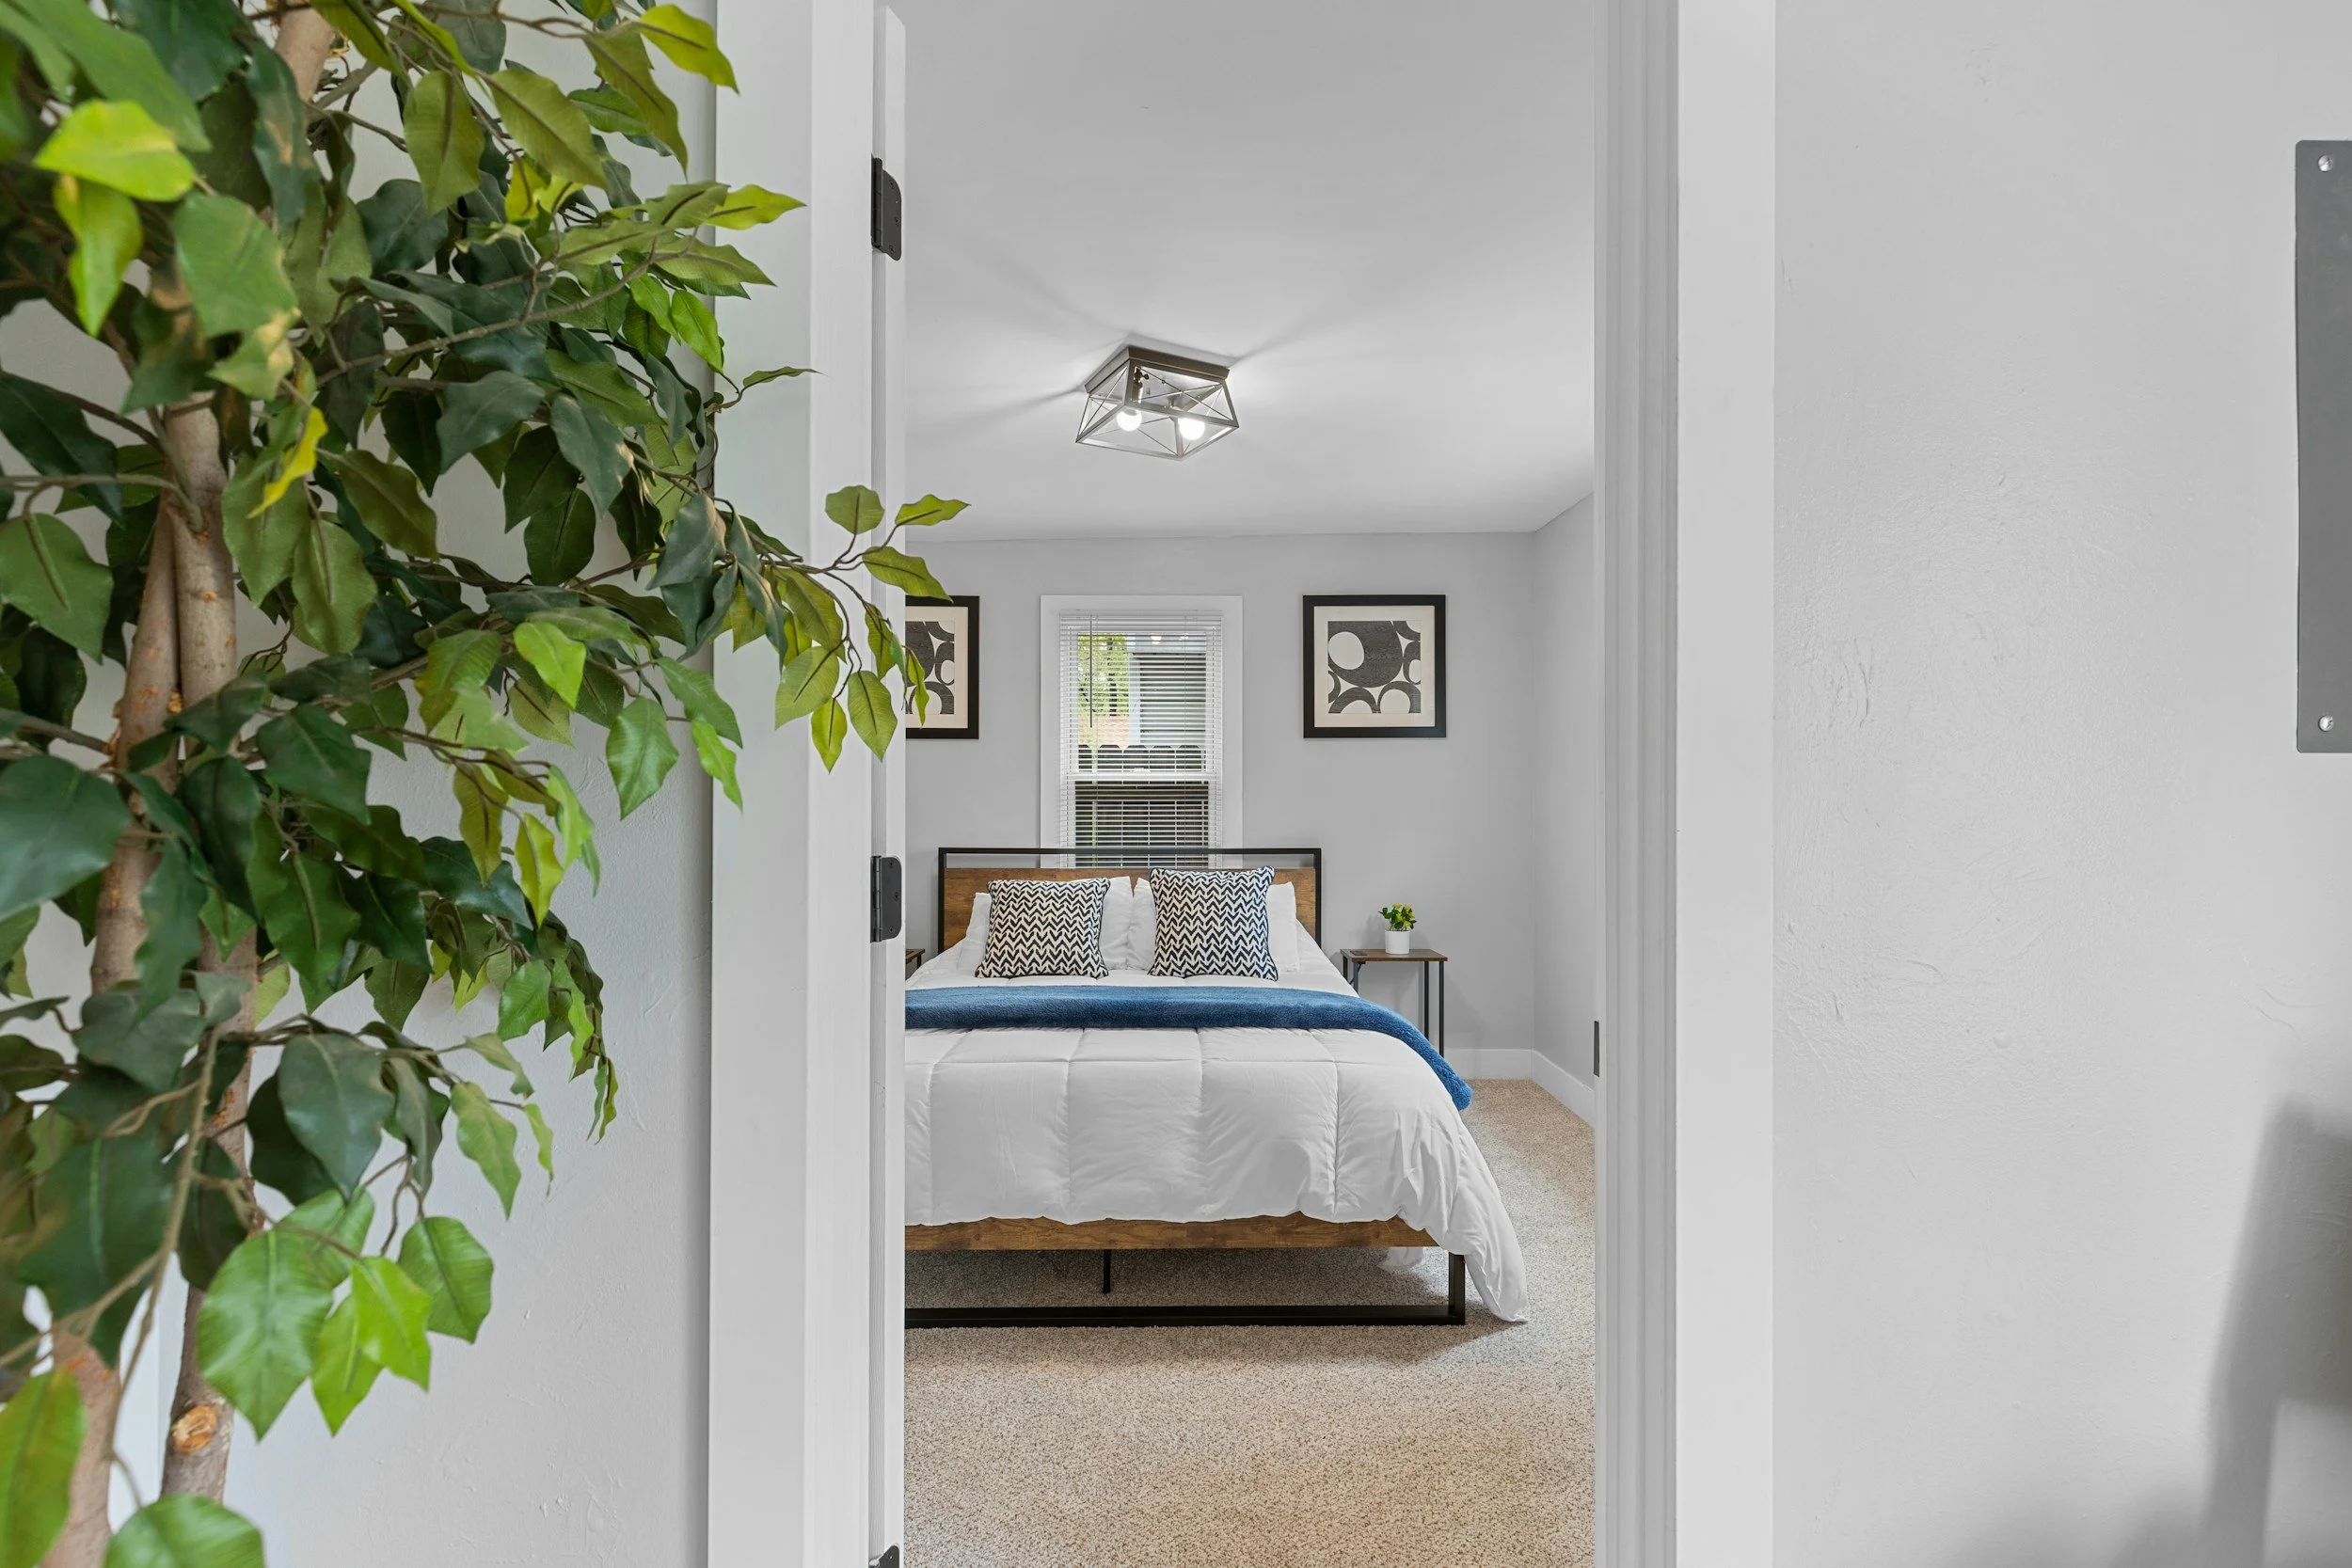
Tip: For cosy Airbnb bedroom photos on iPhone or Android, aim for late-afternoon or bright overcast light. Make the bed hotel-tight, layer textures (linen duvet, knit throw, two pillow heights), and add a simple bedside scene—book, small plant, warm mug. Shoot landscape at 4:3 with the grid on and keep the phone around mattress height for a natural perspective. Start with a straight, symmetrical hero shot from the doorway, then a corner-to-corner angle showing flow to the window. Tap to focus on mid-tone bedding and nudge exposure down (~–0.3 EV) to preserve highlights. Avoid mixed lighting: choose daylight or matching warm lamps. Use the main lens (skip ultra-wide to prevent stretching). In edit, straighten verticals, keep whites neutral, lift shadows slightly, and apply the same gentle look across the set.
FAQ for UK Airbnb Hosts
How do I take Airbnb photos with an iPhone?
Use 4:3 with the grid enabled, tap to focus, pull exposure down slightly to keep window detail, and shoot in natural light. Keep edits light—straighten, crop, gentle highlight/shadow adjustments—and you’ll get clean, believable Airbnb listing photos.
What are the best Android settings for Airbnb photos?
Where available, switch to Pro Mode: ISO 50–200, shutter around 1/60–1/10 second, white balance locked near 5200K for daylight, and –0.3 EV to save highlights. Night mode is excellent for fairy-lit gardens or a firepit shot.
What’s the best time of day to shoot in the UK?
Late morning or early afternoon on a bright, overcast day gives soft, flattering light with minimal harsh shadows. If the forecast is patchy, pick the brightest window for each room and move through the property in that order.
Is a smartphone good enough for Airbnb photos?
Yes—for updates, seasonal changes and smaller spaces, a phone is more than capable. For your flagship gallery, a professional’s framing, lighting and editing will usually outperform DIY and pay for itself in conversions.
Conclusion
You don’t need an expensive DSLR to showcase your space with confidence. With thoughtful staging, good UK daylight, and the camera on your iPhone or Android, you can create Airbnb photos that are both polished and honest. For your main gallery, a professional photographer will elevate framing, lighting and colour; between shoots, your smartphone is perfect for quick refreshes that keep the listing feeling current.
If you want to go deeper on creating that lived-in (but not cluttered) feel, read my post on staging your home for Airbnb photography. It covers room-by-room styling, prop ideas and a quick pre-shoot checklist so every session - DIY or professional—delivers images that stop the scroll and secure more bookings.